Compressing Videos Using Movavi Video Converter
High quality videos in Full HD and at high quality videos can look stunning, and the definition itself will make it great to watch them. Unfortunately the problem is that these videos often have fairly large file sizes as well, and if you’re keeping them on a device with a limited storage you will end up running into issues fairly quickly.Instead of forcing yourself to get rid of videos because you’re running low on storage space, another option that you may want to try is compressing them instead. That isn’t as difficult as it sounds, and with the help of Movavi Video Converter you will be able to shrink your video file sizes and make them more manageable.
How to Compress a Video
If you’d like to use Movavi Video Converter as a video compression software, go ahead and launch it. In the interface you should find and click on the ‘Add Media’ button and select ‘Add Video’ then select the video you want to compress.
Next you will want to choose the format to convert your video to by clicking on the ‘Video’ tab and selecting one of the options there. If your video is using a dated format, you could compress it using Movavi Video Converter by converting it to a newer format that has better compression – such as MP4 with H.264.
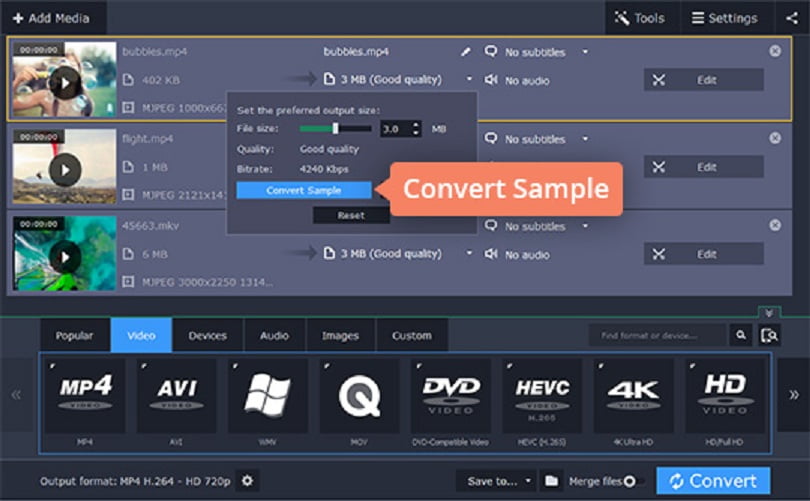
Assuming that isn’t an option or if you want to reduce the file size of your video further, you should click on the file size value in the output information of the video. In the box that appears you can then use the slider to set the file size that you want, and Movavi Video Converter will reduce the bitrate of the video accordingly.
Always remember that reducing the bitrate will affect the quality of the video, and if you reduce it too much artifacts will start to appear. The trick is to find an acceptable balance between the quality of the video and its file size, and Movavi Video Converter will help you see the kind of quality you can expect by clicking on the ‘Convert Sample’ button.
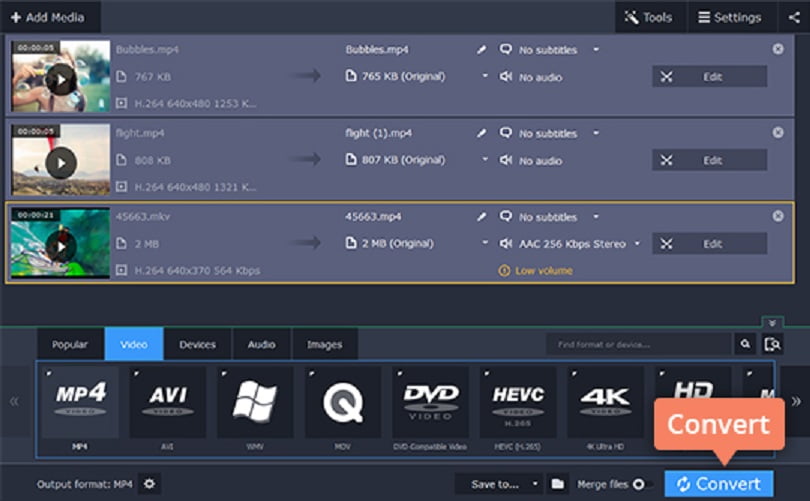
Before you convert your video, remember that by default all videos are saved to the ‘Movavi Library’ folder. If you want it to be saved elsewhere, click on the ‘folder’ icon next to the ‘Save to’ field and set the destination folder that you prefer. Once that’s done you can click the ‘Convert’ button and sit back as Movavi Video Converter converts and compresses your video.
It is worth noting that there are lots of other features in Movavi Video Converter that you can use to convert audio and image files, create animated GIFs, or even edit and improve videos. It is worth exploring them, as while they may not help you to reduce the file size of your videos – they could prove useful. Before that however you should be sure to try compressing a video first, and see exactly how you can save storage space by doing so.